
In terms of careers, the wedding photography business is booming. You can work weekends, set your own hours, and be a part of one of the most special days of a couple’s life. But… where to start?!
If you’re a wedding photographer just getting your feet wet, it can be difficult to attract clients. Only so many of your friends and family are getting married in the right time frame — plus, then you’re down the rabbit hole of I-know-you-so-what-discount-are-you-giving-me, which is so not the place you (or anyone) wants to be. So, it’s time to hit cyberspace — i.e., a (beautiful, functional, stylish) website and a social media strategy. On basically no budget. Going to be a breeze… right?
Enter Squarespace, our go-to platform for gorgeous websites that are oh. so. simple. to create. We love Squarespace for wedding photography portfolios because the sleek, minimal templates they offer pair beautifully with large-scale images — a photographer’s bread and butter. It’s the perfect marriage (haha, get it?) of medium and technology. Since a Squarespace site only takes a few hours to setup, they are an amazing way to get your name out there, immediately. Never be caught in that situation where a potential client goes “I’ll look you up” only to discover upon googling your name an old Myspace page and an ad for a record-checking site. Not great.
Here, we’re breaking down how to get started with Squarespace, with advice from a few of our favorite wedding photographers (who have some pretty breathtaking websites).
Ready to share your vision or business with the world? Start your free Squarespace trial today (no credit card required) and use code ‘EVERYGIRL’ for 10% off when you’re ready to publish your website.
The Finished Product
Getting Started

1. Pick the right template
Conveniently, Squarespace separates their templates by type, highlighting which work best for each type of website. For photographers, we love their Forte template, which allows for high-pixel images (rejoice) and sleek slideshows.
When you’re signing up, be sure to use the coupon code “EVERYGIRL17” for 10% off your first purchase!
2. Decide on a style
The colors, fonts, and copy on your site can influence how visitors feel about you — as a professional photographer and as a person. What kind of balance do you want to strike? What do you want people to feel when they enter your site? Spend some time on Pinterest, gathering inspiration and deciding what mood you’d like the website to evoke.
3. Gather your images
Selecting the images that will be displayed on the homepage of your website is a strategic decision. It’s the first thing potential clients will see when they enter your site and you want to wow them… not have them clicking immediately back out again. Anna Reynal of Anna Reynal Digital Photography filled us in on how she chooses which images make it onto her site’s beautiful homepage: “Keeping a consistent color palette of images with pinks and yellows certainly helped it all fit together. Ultimately, I wasn’t looking for the most perfect or even the very best images I’ve ever taken, which probably sounds counterintuitive. Instead, I wanted them to represent what I want to photograph more of in the future AND match the energy of my brand.”
As a photographer, you most likely have thousands of high-quality images at your disposal (lucky you), so this step is all about editing yourself. What photos stand out to you? Why? Think through the way certain photos make you feel and try to end with a small amount — around 5-10 — of absolutely stellar shots.
Insight from Michelle of Michelle Boyd Photography
“Once I’m finished delivering a wedding collection, the last thing on my to-do list is to first grab all of my favorites for my portfolio. I choose photographs that fit my brand, and always ask myself, “would I add this to my website, or post this to social media?” If the answer is yes, then it makes the cut!
4. Start filling in your site
This part is actually fun — and easy thanks to the demo content Squarespace automatically has setup — because you get to watch step by step as the website comes together. We recommend adding your photos first, so you can see how the style of the site is working with the photos you’ve selected. Start by adding the homepage images you’ve chosen:

- From your template page, choose Start with [Template Name]
- Follow the steps to enter your information and add in your site name. If you don’t have a business name, consider going by First Last Photography (i.e., Jane Doe Photography). It’s simple, easy for clients to remember, and will help get your name out there faster.

- You’re in! From this screen, you’ll navigate around the site and preview changes live on the right side of the screen.
- Start adding your images by choosing Pages and then clicking the gear next to Projects. Choose Create in the pop-up dialogue.

- In the pop-up box that appears, fill in the name of the page that will be used for navigation. Since this page is acting as the homepage of my site, I’ve labeled it Welcome. Click Save in the bottom right of the pop-up to save your changes.
- Since we are currently editing the slider for the homepage (in Squarespace it is called an Index), each image will link to the page for that particular wedding. To start adding images, click on the gear next to the first thing listed under the Index (in Forte, the demo content is called Beast. A pop-up will appear letting you know that you are now modifying demo content. Click Create. Then, click the gear to the right of the word Beast. Rename the page.

- You’re now ready to upload your images (yay!). Click inside the box on the left-hand side that says: This collection is empty. Click here to add your first item. Upload the photos you’ve chosen to display for that collection.
- Follow these steps for each wedding you’d like to feature in the slider on the homepage.
- Need more information? Squarespace has an amazing support page with answers to LOTS of questions you’ll have when getting started. They also have a delightful customer service team, ready to help 24/7.
What to Focus On
1. The About Page
Your About page is the personal focus of your site. It helps potential clients get to know you and put a face with the name — essential for making them feel comfortable having you as a crucial part of their wedding!

Crafting a good About page however… easier said than done. You want to strike a good balance between personal details and professional intent — not too stuffy, but no oversharing either. We love an About page that includes 2-3 stand out photos that show a photographer’s spirit, with a short blurb about who they are. Hint: a few fun facts never go amiss and are always enjoyable to read.
We couldn’t have agreed more with Zak & Dana of Henry + Mac when they told us, “It’s brutal writing about yourself.”
Insight from Zak & Dana of Henry + Mac
“In the end, we just felt like being honest about how we came into this work and how we feel, would be the best way to go. We’re really lucky to have found each other and this work in the infinite abyss of other paths we could have taken. We thought that maybe our people would relate to something in that.”
Creating your About page (at least… the non-writing parts!) is easy, as Squarespace templates already have an about page pre-created and filled with demo content. Simply click on the page to edit it, then hover over the block — whether image, text, spacer, etc. — to edit. Need assistance? Don’t forget about Squarespace’s comprehensive support page.
2. The Contact Form
Making sure potential clients can get in touch with you is absolutely KEY — it’s basically the entire point of the site, right? Be sure to make your contact page easily accessible — don’t make people search for it — and quick to fill out. Some tips:
- Don’t write in your actual email address — you’ll be positively bombarded with spam. Use a contact form instead. More on how to setup a contact form in Squarespace below.
- Ask for the information you need. You don’t want the form to be long and unwieldy, but don’t be afraid to ask pertinent questions! Along with name and email, ask for budget, timing, size of wedding, location, etc. to get a well-rounded look at whether or not this client is a fit for you.
- Make it (a little) fun. Instead of the plain old Submit at the bottom of the form, try Send It! or And Away We Go… anything with a touch of personality. Next to the form, include a blurb along the lines of “looking forward to hearing from you…” — another great opportunity to add personality to your site!
To create the form, start by creating a contact page on your site. Under the Pages section, click the + to the right of Main Navigation. In the pop-up box that appears, choose Page. Name your page, and choose from one of the helpful starter layouts Squarespace provides — to make setting up your site even quicker. When you’re ready, click Start Editing.

To edit the form within the page, hover over the form and click Edit. In the form pop-up box that appears, you can name your form and add or delete sections as necessary.

3. Client Reviews
Establish yourself as a professional by including a few select reviews from previous clients. Don’t worry if you don’t have many (or any!) at this point — build them up over time by asking after each event. Add a call to action at the bottom of your emails for reviews and don’t be afraid to reach out to clients directly… most will be more than willing to take a moment and write something up!
Keep in mind that, as Anna Reynal told us, “When you’re starting out, having any online presence is better than having none.”
Insight from Anna of Anna Reynal Digital Photography
“Start where you can, whether that’s DIY or hiring a designer. But know that as you and your business grow, so should your online presence. Websites are always editable, and mine go through constant revisions, even after they’re officially launched.”
To add client reviews to your site, choose the page you’d like them to go (I chose the About page) and hover over the area where you’d like to add the reviews. Click the black line that appears, then click Quote. In the pop-up box, fill in your review and the source.

4. Social Integration
Squarespace makes it easy to add all your social profiles to your site, to ensure that potential customers, admirers, and friends can follow your journey. Social media is a crucial way to draw in new visitors to your site, so make sure that your followers know where to reach you by adding your new URL to all your profiles.
The consensus among all the photographers we interviewed for this story? Instagram is the way to go, social media wise.
From Zak & Dana: “Now everything lives and dies by Instagram, for better or worse. For small businesses like us, the sharing community has totally changed the game and made it possible for us to shoot weddings in Uruguay, Mexico, California, and all over New England. Like everything else, though, we just try and keep it as genuine as we can so we always feel like it’s still representing our work. We’re trying to stay focused on creating more for our couples and ourselves than for likes and shares.”
From Michelle Boyd: “I’ve had a very steady and constant growth in Instagram followers, which honestly overwhelms me — to think that every time I share a photograph thousands of people see it! WOW. I’ve had countless inquiries and weddings booked because someone saw my feed, or their friend shared one of their wedding photographs and tagged me. It’s incredible!”
From Anna Reynal: “My daily mantra right now is that life is supposed to be fun, so I tend to focus my energy on whichever platform’s infinite scroll feels the happiest. Instagram, for now, seems to have found the magic formula for being inspiring, informative, and still feeling personal.”
To add your social profiles to your Squarespace site, navigate to the main menu and choose Settings. Click Connected Accounts, and then add any and all accounts you’d like from Squarespace’s comprehensive list.
The Finishing Touches
You’re almost there! Now, it’s the fun part — where you can add your logo, choose colors and fonts, and bring the whole site together.
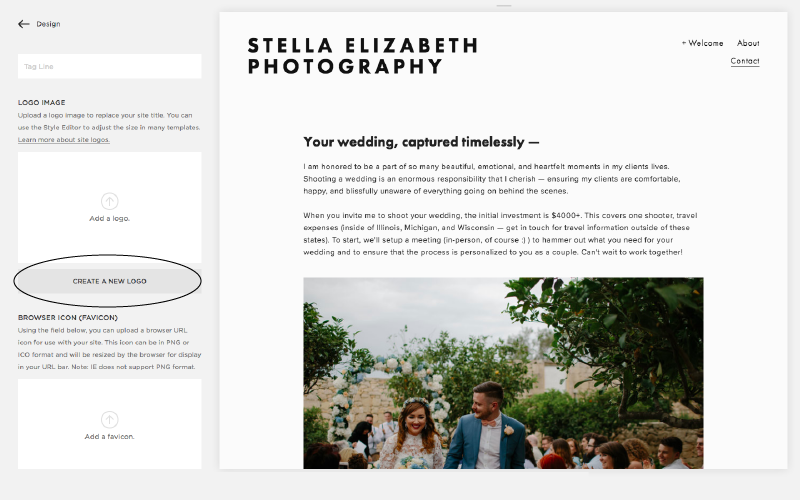
To add your logo, click Design > Logo & Title. Upload your logo in the indicated box. Don’t have a logo? No worries, click Create a New Logo to use Squarespace’s free (yes, free!) logo builder.
Changing the look (the font, spacing, colors, etc.) is all found under Design > Style Editor.

The great thing about Squarespace is that you can preview style changes live, making changing fonts and colors WAY easier. In the preview section on the right, simply click on the section you’d like to change, and then make adjustments with the menus on the left. Easy, peasy.
When thinking through the style of your site, remember that you want your photographs to really sing — don’t go too crazy with fonts, colors, and graphics that will overshadow your photos. As Michelle Boyd told us, “Nine times out of ten, when I meet with a potential client they say things like, ‘we love everything we’ve seen, and looked through every gallery on your site!'”
Insight from Michelle of Michelle Boyd Photography
“One of the biggest things I wanted to have were a LOT of photographs. I’ve been told time and time again to have a very small curated collection of photos on your site… but small just doesn’t work for me! I’ve been blessed to photograph many different people, styles, and kinds of weddings, and I’ve found that brides really want to SEE your work. And that’s the perfect client for me — someone who’s excited to book, and who can visualize herself and their wedding day in my photographs.”
And that’s it! Remember, designing and creating your website is a process that you can go back to again and again. So if it’s not perfect a the moment, don’t fret. It’s all about progress over perfection. Even the most sophisticated websites are constantly evolving and changing. Putting yourself out there and getting your site up quickly and easily is just the first step. Good luck!
Ready to share your vision or business with the world? Start your free Squarespace trial today (no credit card required) and use code ‘EVERYGIRL’ for 10% off when you’re ready to publish your website.
![]()
This post was in partnership with Squarespace, but all of the opinions within are those of The Everygirl editorial board.
