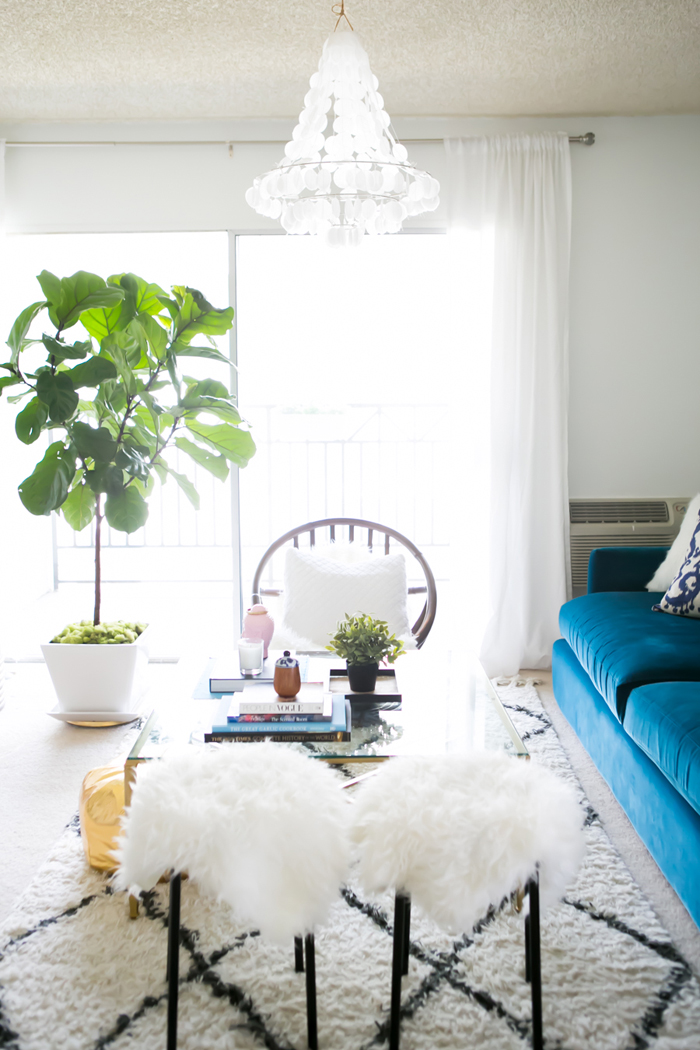
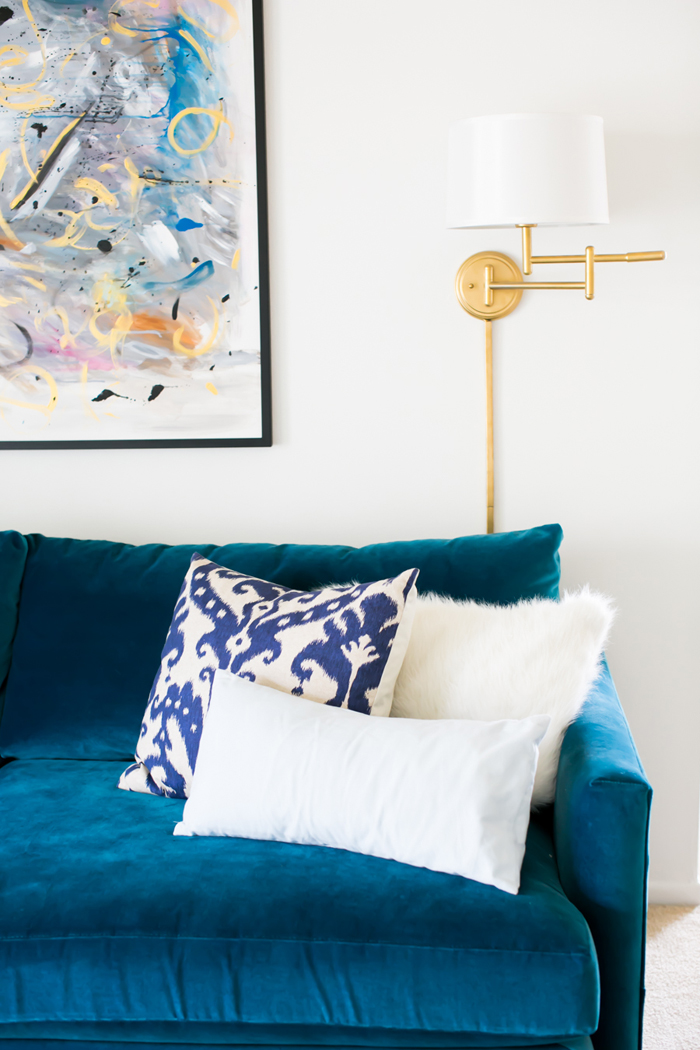
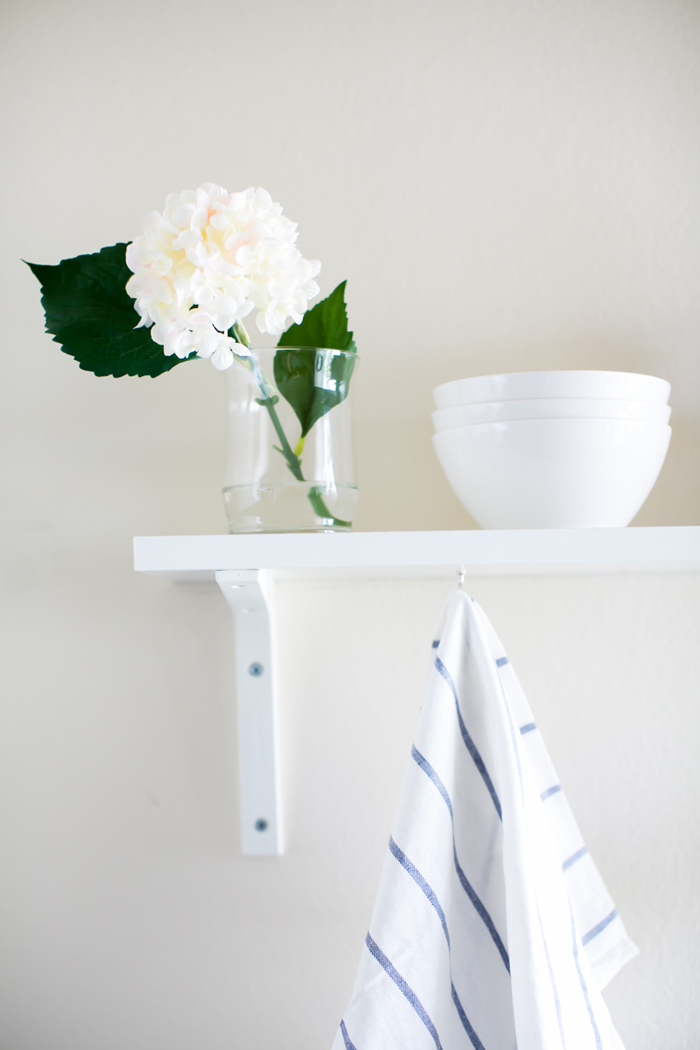
When you think of a young Hollywood actress’ home, the words “budget-friendly,” “DIY,” and “750 square feet” don’t usually come to mind. But for Katherine Vo, these were words she embraced after five years of living the LA life. “The budget was a constant reality check but it forced me to get resourceful and creative, hence all my DIY endeavors.” With zero furniture between them, Katherine and her husband created their home from scratch. The result? A cozy-chic abode filled with luxe and sophisticated DIYs you’d never know were done by a novice.
Today Katherine generously shares the process for designing her home, all the tips she acquired along the way, and the only request her husband made. Let’s just say, we’re totally sold on the “Nap Master!”


Name: Katherine Vo
Age: 29
Location: Orange County, CA
Educational Background: USC – University of Southern CA, B.A. in Theatre Arts
What was your first job out of college and how did you land it?
My first job out of college was in the business office at a private high school in Los Angeles taking care of accounts payable and deposits. I found the job through Craigslist! I liked that it had nothing to do with my aspiration of acting, as it grounded me with balance, stability and “normalcy” while I pursued a career in entertainment and fashion amidst fast-paced and unstable Hollywood.
What brought you to Orange County? How did you decide on a neighborhood? What do you love most about it?
After a five year stint living in LA, we decided to move back to where we grew up. Not only does The OC consist of pretty suburban communities with ample parking (you never take parking for granted again after living in a big city) and easy access to the beach, it has the best Asian food around, specifically Vietnamese food thanks to Little Saigon. I am Vietnamese and my husband is Caucasian but we both agree that Viet food is our favorite and it was nice to be back home where there’s a pho restaurant on every block! Our neighborhood is very close to the freeway, surrounded by great food options, and is 15 minutes from the beach. I do miss the vibrant energy and culture of the city, but I can’t exactly complain about the relaxed, easy lifestyle of these coastal suburbs.
You and your husband had no previous furniture and got to start with a blank slate. Did he give you carte blanche to decorate the way you wanted? Was there any piece or style he absolutely nixed?
Bramley deserves a lot of credit for not only trusting me to do whatever I wanted and respecting my Director Hat, but for substantially supporting my vision and faithfully helping me execute it. I have to admit that whenever he did have input, it was very valid and useful. There were times when he’d question or give me a hard time about a certain choice at first, but once he actually saw it come to fruition he’d realize I was right all along. And he didn’t really nix anything, but instead made one demand: he wanted a “couch-shaped bed” so that it could moonlight as a bed for guests (since we don’t have a second bedroom) while functioning as a sofa by day. He’s not a fan of pull-out beds so our sofa had to be deep enough to sleep on comfortably. The result? Meet our 46″ deep soporific couch-strosity nicknamed “The Nap Master.”


Given the blank slate, where did you even begin to start? Did you have a theme in mind or key pieces you knew you wanted? Do you have any advice on how to develop a style for those blessed with blank slate opportunities?
It can actually be daunting to begin with a blank slate because you can do pretty much anything, but I decided to start with the color scheme. I had such a blast scouring the internet for inspiration. From Pinterest to interior design publications like Lonny Magazine and Elle Decor, to lifestyle blogs and resource sites like The Everygirl, I looked everywhere for ideas! I literally browsed hundreds and hundreds of photos of bedrooms, living rooms, and vignettes and acquired a library of images that spoke to me, no matter what they looked like or whether or not I planned on emulating that look. I guess it was a bit of an intuitive process. I simply wanted to call upon my subconscious to identify whatever caught my attention. Afterward, I started to look for a pattern within my collection of images and analyze what had repeatedly resonated with me. I realized that I often bookmarked interiors that had white walls, with splashes of blue, black, or pink, and gold accents. From there I began to create my color palette and overall aesthetic.
What were some of the challenges you faced in decorating your home? How did you overcome those challenges?
Going off of the previous question regarding my instinctive approach to developing a theme, the challenges I faced went from “what do I like/want?” to now “how do I create this with a limited budget?” and “will this work with my space?” The budget was a constant reality check but it forced me to get resourceful and creative, hence all my DIY endeavors. Another challenge I had was making my living room cozy. Before this apartment, I never gave coziness a second thought and therefore never realized just how difficult it can be to create it. After studying the art of cozification online, I learned that you need lots of texture (fur is the best), close spacing of furniture (to bring the room in), pillows, and tons of candles to produce warmth and comfort. A good shag rug is also essential.
We love the statement art above the sofa! Tell us the significance of that piece.
Thank you! Wall art can be expensive, so I decided to channel my inner artiste to create my own. I bought a huge canvas and spent two days painting it in the kitchen while listening to music to get me in the creative mood. I’ve always loved painting growing up, but I’m still no pro, so I figured the only style I could really get away with is abstract. Great thing about abstract art is that anyone can do it. There’s no right or wrong way, it can look like anything! I purchased 5 colors of acrylic paint and mixed the rest. I wanted the piece to reflect and match the current living space, so naturally I incorporated the same color scheme I used throughout decorating the apartment. But I definitely recommend making your own statement art. It’s cost effective but more importantly, it’s therapeutic, gratifying, and a fantastic way to spend quality time with yourself!


Speaking of the sofa, what prompted you to go with blue velvet? Collective conventional wisdom from the interior design community states that we should invest in neutral sofas to maximize versatility. Were you ever afraid of investing in such a boldly colored sofa?
Sofas are often the stars of the living room so from the get-go I wanted a statement sofa. I initially opted for velvet because it just looks so luxurious and inviting. It’s a rich texture that is comfy cozy yet stylish and chic at the same time. And blue is a color that’s very versatile, so it could go with an array of different colored throw pillows. It was definitely a tough choice though pondering whether to play it safe with a neutral couch or take a risk with color! I vacillated between the two for months, but ended up deciding on color because I wanted to live in the moment and satiate my desire for the bold choice. The problem with living in the moment though is that the moment constantly changes. Unfortunately, this is not practical for your wallet when your tastes and preferences are always evolving. If money isn’t an issue, I’d say go for it! Don’t be afraid of color if that’s what you’re currently lusting for, or if that’s your favorite color and you’ll always love it. But if you change your mind and style often, listen to conventional wisdom and stick with the neutrals!
Here at the Everygirl, we firmly believe that being on a budget is the mother to all DIY. Tell us about your DIY projects and any tips you have to share.
I did a lot of DIY pieces thanks to the plethora of brilliant tutorials online. My wax paper capiz shell chandelier, fur stools, pouf ottomans, bubble chandelier, and blue nightstands would not have been possible if it weren’t for the collective guidance of the creative minds of the blogosphere. Everything I did was my first time, and I had so much fun getting inspired by others and finding ways to make projects my own and unique by adding adjustments and embellishments.
One of the easiest and simplest DIY project that I did was making my own decorative trays. Trays can be pricier than you expect, so I used the lids of boxes and picture frames (just remove the backing). They’re not strong and can’t actually transport anything, but if you’re just looking for a stationary tray atop a table, dresser, bar, nightstand, or coffee table, they’ll do the trick. I just cover the tray in decorative tape or use pretty fabric or paper to cover the bottom. Voila.
I also found the ability to sew my own throw pillow covers an extreme advantage. Pillow covers can be ridiculously expensive, especially the ones with designer prints. Even if you find the discounted ones from TJ Maxx or Target, they can still cost $20 per pillow. Multiply that by 4-6 pillows and it can add up! I simply purchased cheap pillow inserts from Ikea (or you can just cover existing pillows) and then went to town at my local fabric store. I got to customize my sofa to my liking but without breaking the bank.
My biggest advice for DIY: If it feels like work, don’t do it. Sometimes it’s better to try to purchase something if the thought of making it stresses you out. You don’t want to get frustrated half way and quit a project because it’s too difficult. If I saw a fantastic DIY idea online but it seemed like too much work, I looked for something else. It had to excite me and be attainable and realistic with my skills. Certain projects, such as my wax paper chandelier, campaign dresser or blue nightstands, are tedious and take a few days to complete. It wasn’t always easy but I tried to enjoy the whole process as much as possible. DIY is best when it’s fun. The more you love doing it, the better your projects will turn out.
What are your favorite resources for shopping on a budget? Tell us about your best score.
Estate sales, IKEA, and Craigslist. Ikea was definitely the easiest resource. I probably went to Ikea as often as I went to work during the months I decorated. Estate sales were more of a hit and miss and took a bit of work because they can be all over the place and often you have to get there on the very first day or the good stuff will be taken. You will have to compete with estate sale sharks! But if you can wait until the last day everything is usually half off. Craiglist is my favorite resource because you can shop from your computer and you can get anything off it. Plus, I value the personal connection and interaction that comes from buying something directly from another person versus a vendor or store. It’s a completely different shopping experience. I also like second-hand items because not only are they cheaper but you’re essentially recycling. My best score would probably be all of my vintage rattan pieces (a swivel chair, foot stool, magazine rack and sofa side table) that I got from Craigslist. They were absolutely free!


Do you have any other budget-friendly tips for making your home look like a million bucks?
Two words: spray paint. I simply created the illusion of high end by spray painting furniture and decor. We ultimately went through over 20 bottles of spray paint! I painted everything from the coffee table, dressers, lamps, and chair frames to smaller things like picture frames, lamp shades, lamp cords, drawer pulls/knobs, and the glass balls on my bubble chandelier. I particularly used a lot of gold paint. I think painting something gold can instantly upgrade its look and make it appear more expensive and high-end, so I used that trick quite a bit. Another great budget lesson I acquired is that you might not need to go out and buy new decor to fill your home. Just take something you already have, or better yet, take something you want to get rid of or have in storage, and give it new life by painting it. I will never look at an object at face value again. Anything can be transformed with spray paint now. With a little imagination, random artifacts can have endless potential and possibilities! But you don’t always have to alter an object’s appearance. Sometimes you just have to think outside the box in order to view it with fresh eyes. So work with what you already have because ANYTHING can be used as decor. Unexpected things like jewelry, cameras, perfume bottles, decorative boxes, matches, nail polish, cups, maybe old wallets you don’t use anymore, etc. can be used and re-purposed as decor. You can display literally anything if it fits with the overall look and style of your place.
Your husband affectionately nicknamed you “Queen Midas” after your penchant for gold spray paint. What are your favorite things that have undergone the Queen Midas touch? How did you keep from going overboard with it?
The first piece of furniture to undergo the Midas transformation was the glass coffee table that was originally silver. Along with the sofa, it’s the centerpiece of the living room so it’s important that it ties the room together and represents the gold theme. After I saw how beautiful it turned out and what an improvement the gold was, I contracted Midas fever. It wasn’t until halfway through the decorating process that I realized I could potentially have TOO much gold. I salvaged the situation by dispersing the gold pieces evenly throughout the space and then balancing and contrasting them with wood pieces and other metals. I also decided that having one large piece of gold furniture, the coffee table, is enough; everything else had to be accents only, merely pops of gold rather than a major chunk of gold. For those interested, I used Rustoleum’s Metallic Gold spray paint.
Carefully styled vignettes (like the lovely ones on your coffee table and bar area) are an Everygirl staple. How do you keep them from looking cluttered? How do you know if you’re incorporating too many decorative objects?
Carefully styled is right! I was SO meticulous. You have no idea how many times I played with different objects, positions and spacing to get the right look! To keep things from looking cluttered, I sectioned areas by using trays and books. Trays add visual interest and can clean up a surface by allowing objects to be displayed in a confined area. This creates a grid-like appearance and prevents a tabletop from looking messy. I also used books as trays so that I don’t use more than one tray per surface. And of course, vignettes would not be complete without a vase of blooms or a potted plant. You also have to just rely on your artistic eye and intuition to keep from using too many objects. What helped me was taking constant pictures. I’d style an area several different ways (sometimes changing it by simply removing/adding an object or moving it) and then photograph it to compare what looks better. If it looks good in the photo, it probably looks good in person, but vice versa that’s not always the case. For me, it was A LOT of trial and error.
You have such an adorable puppy! Is it ever a challenge for all three of you to share 750 square feet of space?
It’s not a challenge because thankfully we were able to convert the walk-in closet into Bramley’s office and Man Cave. Without that, we’d definitely have trouble finding space for all his things! And luckily Boba is a small dog so 750 sq ft is the perfect amount of space for him. I love living in this size of a home though because if we had a bigger apartment I’d need a bigger budget for decorating!

Katherine Vo is the Everygirl….
If you could have lunch with any woman, who would it be and what would you order?
I suppose Keira Knightley, because we’re the same age, she seems down-to-earth, cool, and I could listen to her accent forever (and would join in). We’d have a good laugh and long chat over eclairs, any dish with bleu cheese, and Bloody Marys before then heading off to her London flat to spend the evening playing board games together with our husbands. Keira if you ever read this, ring me.
Dream purchase (for home or otherwise)?
My dream purchase would have to be a loft-style condo in a high-rise building, with hardwood floors, crown molding, giant windows and bright light. Very Scandinavian cozy chic. After that, I’d like a New England style cottage near a coast.
Favorite budget find (for your home)?
The large black bamboo mirror above the campaign dresser bar was only $8 from Craigslist! I had to drive almost 2 hours to pick it up, but it was worth it. And originally it was an off-white color but, surprise, I spray painted it! And even though my black and white campaign dresser that serves as the bar area wasn’t as cheap as my bamboo mirror, it’s my favorite buy because it was a challenge to find (we eventually came across it at a local consignment store) and also because Bramley worked very hard painting and refurbishing it. It’s one of those pieces you just know will stick around forever.
Next vacation destination?
Paris, London, and Zurich in May for our belated honeymoon and one year wedding anniversary!
Best advice you’ve ever received?
Get the inside right, and the outside will take care of itself.
Resources
Sofa – Crate & Barrel in custom upholstery (color: Peacock Velvet)


 "
"