When I first moved into my apartment, I thought I was the luckiest girl on Earth. I looked at—I kid you not—about 25 apartments over a two-month period. I used my lunch almost every work-from-home day to go look at apartments, and my weeknights were booked with apartment viewings too. I spent more time on Zillow than Instagram and Twitter combined. It was one of the most stressful experiences, and I still have some low-key trauma to work through from it. So when I finally found the one, it was perfect. I loved every single thing about it, and I had grand plans for how I’d decorate and make it my “forever” (AKA until they increase the rent, LOL) home.
Well, I didn’t exactly move with a bank account full of savings. I ordered the bare essentials to get me through the first few weeks, and that’s pretty much how it went for the last six months. I officially reached capacity for my makeup storage and was in desperate need of some makeup organization. (I also caught quite the organizational bug as soon as I started social distancing.) I did it on a budget because I’d rather spend my cash on new eyeshadow palettes! Here are all the steps I took to get my makeup stash in order—from getting rid of products I don’t use to what I used to organize and decorate my favorite space in my home.
Time to get your organization on.
BEFORE:

I wish I could say that drawer is open for dramatic effect, but nope, it’s just how I live.

1. Take stock of what is and isn’t working
This goes for both your products and your organization. Throughout the entire week before I started this process, I paid attention to what I was using and how all of my products performed. I used things that I haven’t in a while to make sure I still like them. Consider this a “chopping block” for your beauty products.
I also paid attention to my storage. I noticed that I enjoy where I specifically store my makeup (on a shelving unit next to my vanity/desk), but my products weren’t organized in any way, so oftentimes I’d just leave whatever I used last on my vanity and never put it away.
2. Take everything out
Yes, seriously—everything.

I pulled everything out of every drawer, every purse (doesn’t everyone have like three lip balms strewn about every purse they’ve ever owned?), my bathroom cabinet, nightstand, vanity, every organizer, and so on. It sounds crazy, but it was kind of therapeutic. Just sitting there, hanging out with all my products. They comfort me :’)
3. Clean everything
Now that everything is out of your storage containers, use this time to wipe down and sanitize every surface and clean all of the containers you use. Makeup is messy! I cleaned every surface, and then I wound up putting all of my storage bins in the kitchen sink to give them a good washing. I also wiped down all of my products. Maybe it was overkill, but when was the last time you sanitized all those bottles of foundation, concealer, mascara, etc. that you use every day? I rest my case.
This is also a good time to thoroughly clean all of your makeup brushes–including your beauty sponges! About once a month, I put all of my sponges in a mason jar with some warm water and dish soap and let them soak. Consider it a washing machine for your sponges.
4. Swatch everything
If you have a huge collection, you can do this section by section (foundations, blushes, lipsticks, etc.). However, I found the best way to spot dupes and products that I don’t use often was by laying out my entire collection. This took a little while. I swatched about a thousand things on my hands; I’m pretty sure I still have red lipstick stains (even after all the excessive hand-washing). But I realized I had so many lip products of the same shade, eyeshadows duped over multiple times, and products that just aren’t my taste anymore. I grabbed an old shoebox and dumped in every product that was no longer speaking my language.

“Isn’t she lovely 🎶 ” I sing to my lip products
5. Get it out
Once you’ve decluttered everything, don’t leave it in a box or bag in your apartment forever. The items aren’t decluttered until they’ve actually left your home. I recommend taking them to a donation center or researching organizations that will accept gently-used makeup items that can be sanitized. Anything that can’t be donated can always be given to friends and family! However, make sure to toss anything that is expired or can’t be sanitized.
Now that you’ve decluttered, time to organize.
6. Organize products by what’s easy for you
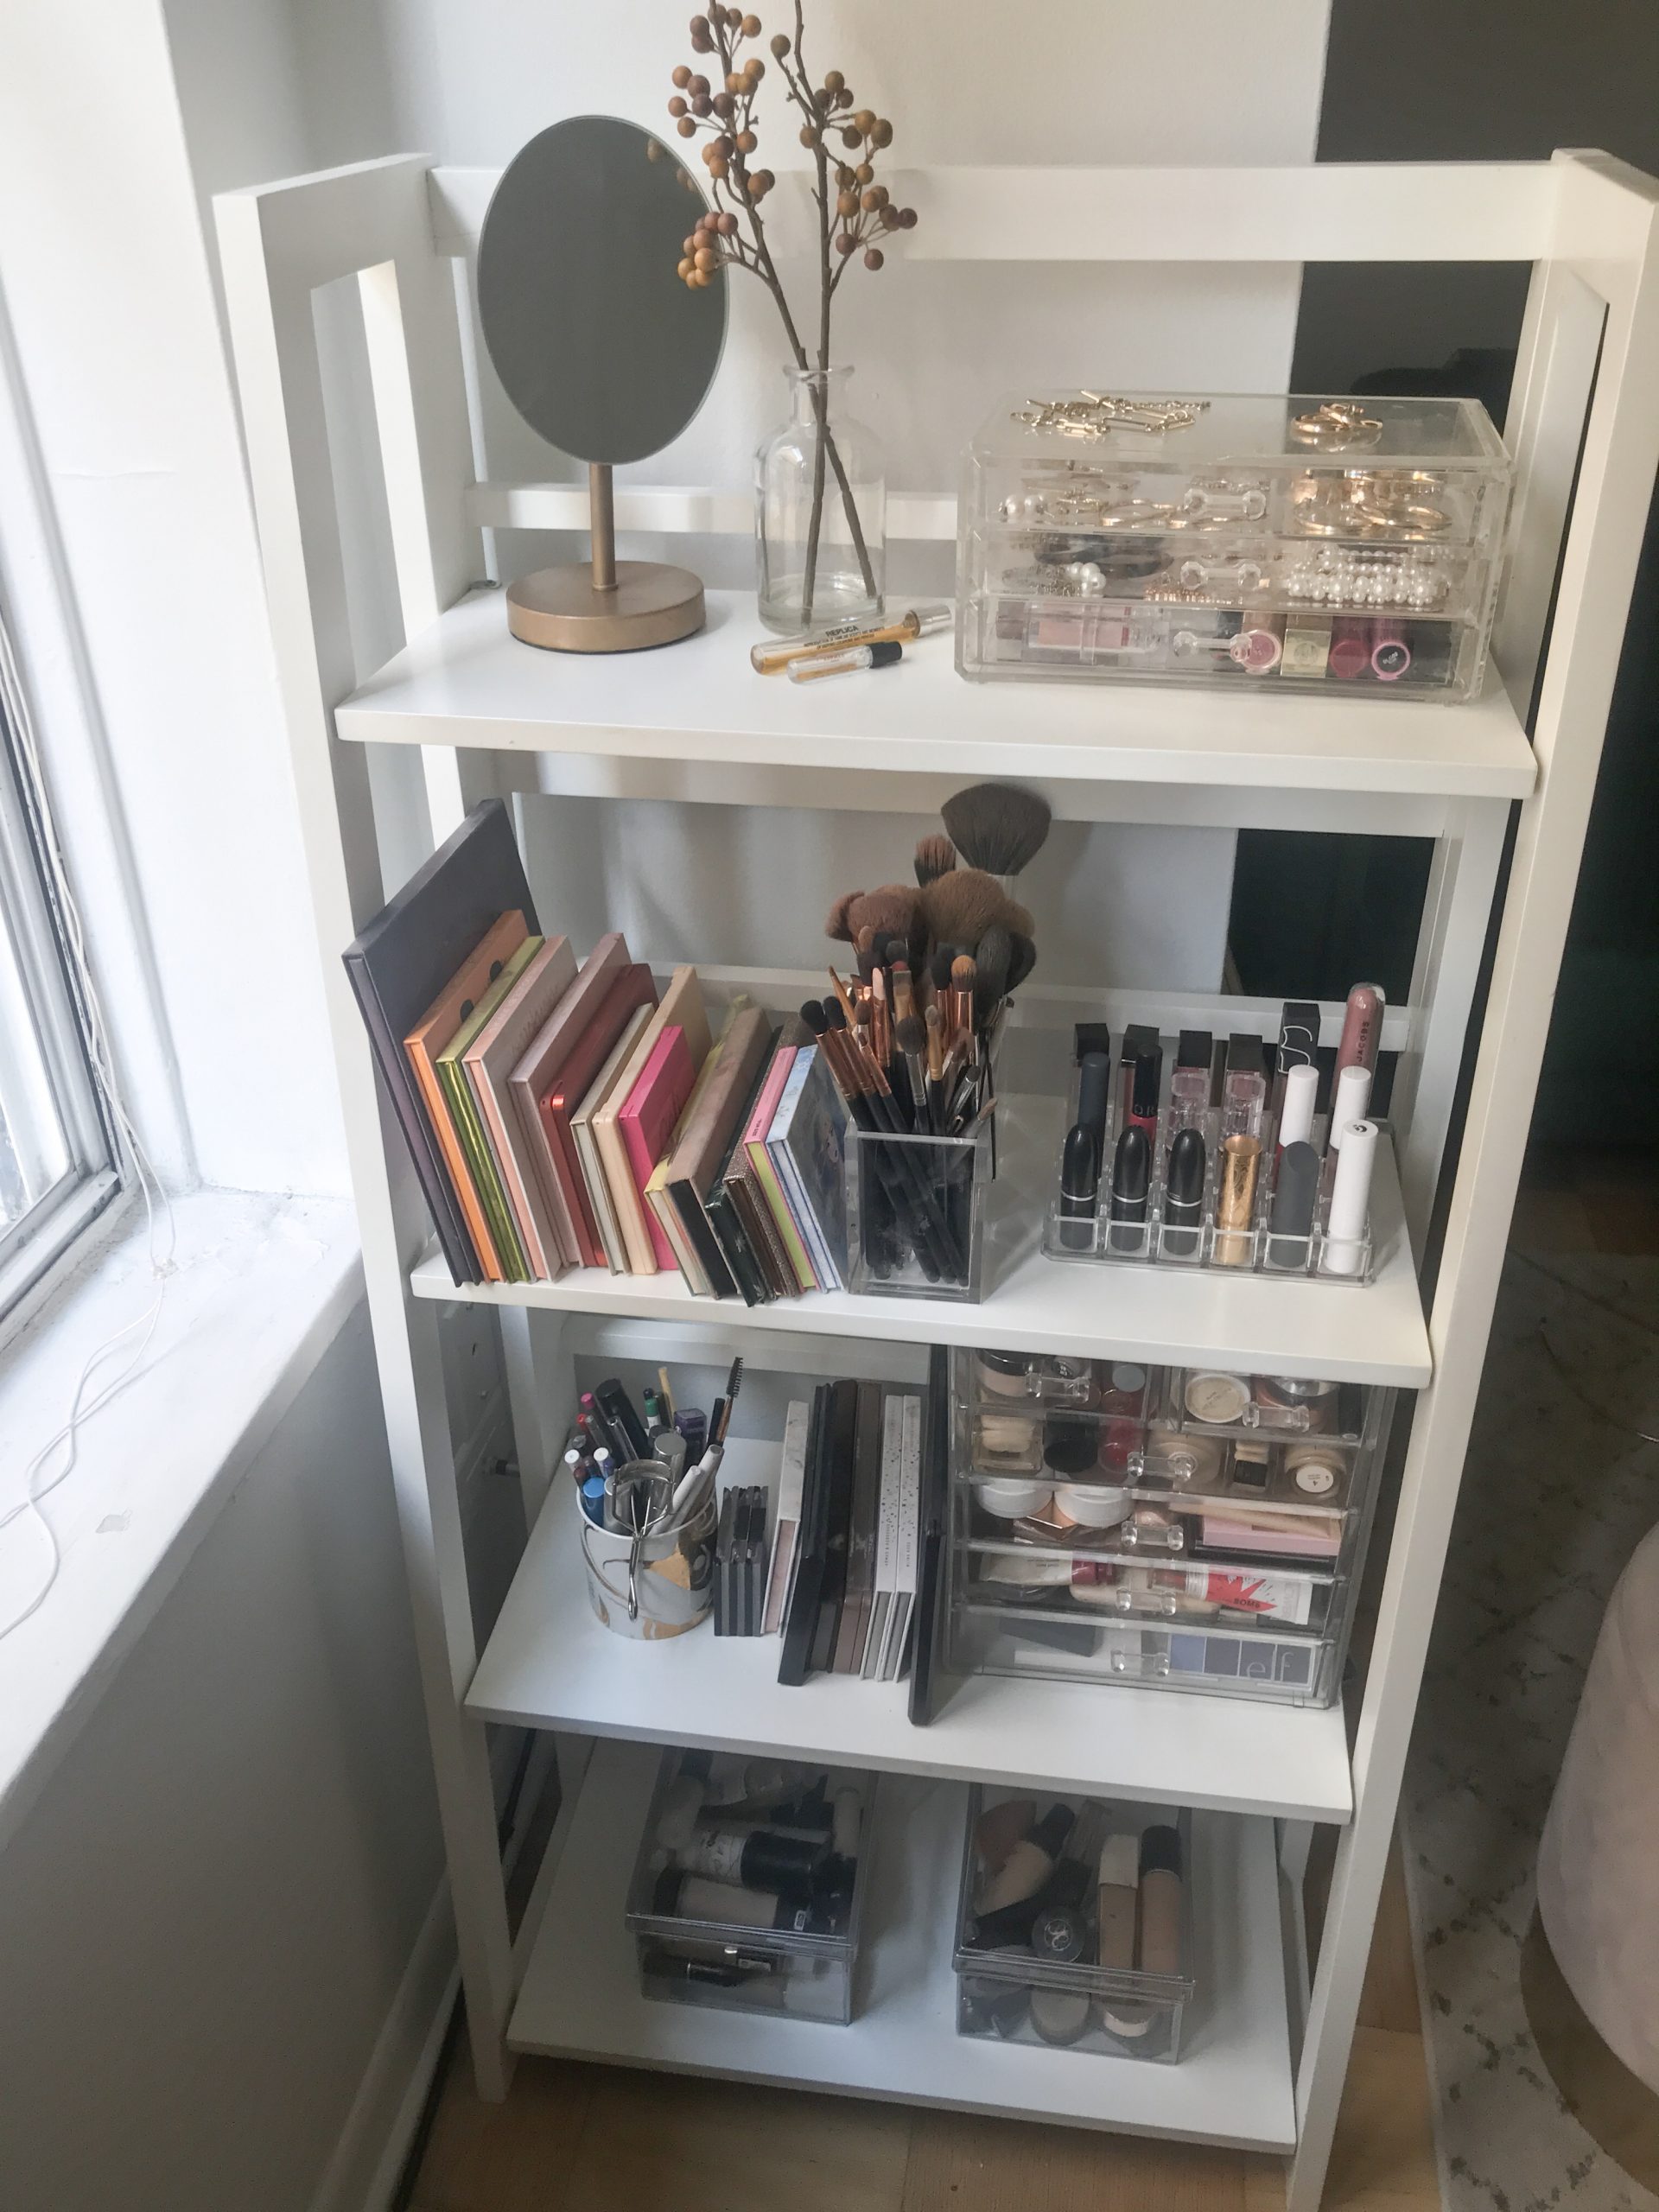
I organized my products by how I use them. I created a drawer for the foundations, concealers, and primers I use every single day. Then, I created a drawer for blushes, a drawer for bronzer and highlighter, and a drawer for my smaller palettes. Then, I worried about everything else. Single shadows that I don’t pull for all the time? Those go in a small bin at the bottom of my shelves. Foundations for my summer skin tone? Bin. Extra beauty sponges? Bins on bins on bins.
However, if it’s easier for you, organize products by type. Put all foundations in one drawer, and all concealers in another. This is why that inventory step in the beginning is so important!
I also added an acrylic organizer to my desk to hold new products and things I’m hoping to get more use out of rather than putting those products right back into my collection to get lost. This acrylic organizer is small enough to make sure products don’t overtake the entirety of my desk but allows me to keep a few things front and center.
7. Use your products as decor
I spend a lot of money on makeup, and it’s certainly a huge hobby of mine, so I knew I wanted this to serve as a piece of decor in my apartment (I mean, it takes up enough space). So, it wasn’t all about organization; I focused on making it look pretty too. I used a lipstick organizer to display my favorite lip products, and I stacked my eyeshadow palettes for easy access (and because they’re just all so pretty).
8. Add decor to fill in space
I had some extra space at the top of my shelving unit, so I used it to display and organize some of my jewelry. I also added a small vase and a gold mirror for, you know, ~aesthetics~.
And drumroll … the moment you’ve all been waiting for:
AFTER:


 "
"


