Thanks to a thriving social calendar, my makeup collection is finally getting the much-needed love it missed for a while. My black liquid liner, my eyeshadow brushes, and my palettes have been dusted off and are getting more action now than ever. With a host of events and meetings comes new eye makeup looks, but my skills have diminished quite a bit since my makeup hiatus. Applying liquid eyeliner is somehow the bane of my existence, and don’t even get me started on smudgy mascara. Something had to be done. Whether you just haven’t worn makeup in months or are an eye makeup beginner, here are the ins and outs of eyeshadow, eyeliner, and mascara, as suggested by two makeup artists.


Why an Eyeshadow Primer Is Essential
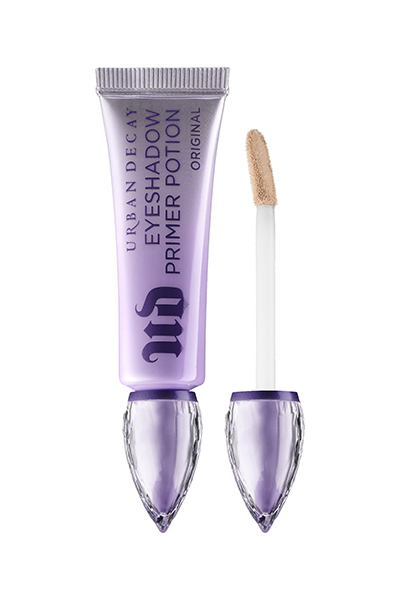
If you’ve ever watched a beauty video on YouTube, you’ve likely heard of eyeshadow primer, but what exactly does it do? “If you have oilier eyelids and your eyeshadow creases, a primer will nip that in the bud,” said celebrity makeup artist Renée Loiz. “Primers take away the oil and smoothen out the surface, ensuring whatever you apply on top of it will stay in place.”
But do you have to use a specific eye primer? Celebrity makeup artist Jamie Dorman said concealers can work well if they’re silicone-based and if you dust with a bit of powder before applying your eyeshadow. If you have oily eyelids, Loiz recommended primer for keeping oil at bay instead of adding another creamy texture to the eye.
You can never go wrong with the original. Use this lightweight, easy-to-apply primer that keeps eyeshadow on all day long.
This is my favorite eye primer for bright eye looks because it’s a very light, almost white base that makes colors pop.
This primer is good for people with oily eyelids who want a little color correction.

Source: @makeupbymario
Tools
If you’re new to eyeshadow, Loiz said the first thing you need is a good set of eye makeup brushes. “These are key to blending in your shadows seamlessly.” Opt for a set of a few brushes to give you some variety, but you mostly need one shader (to put product on your lid and inner corner), one blender (to blend shadows in the crease), and one liner brush. If you want to get a little fancy, having a pencil brush to apply and smudge product into your upper and lower lash line will give you the smokey eye of your dreams.
This kit contains eight brushes to help you achieve every look under the sun.
This double-ended brush would be perfect for travel (or the minimalist makeup lover).
Smudge a little eyeliner on your upper and lower lash line with this for the easiest nighttime look.
What Eyeshadows to Try
There are over a thousand brands on the market making eyeshadow, and which one you use comes down to preference and budget. “For beginners, I would recommend smaller palettes like the Fenty Beauty Snap Shadow Palettes,” Loiz said. “The smaller size of the palettes are not intimidating at all and come in a variety of shades from neutrals to bright pops of color.” Loiz also recommended Pat McGrath, Makeup By Mario, Juvia’s Place, and Cozette, and Dorman recommended Rituel De Fille, LORAC, Buxom, and Bobbi Brown.
“Beginners should have a good collection of matte shadows that mimic the depth in shadows on their own skin,” Dorman said. “This will pair well with all colors and is easier to use when learning how to create dimension.” So don’t be afraid to build out a collection of shades that all look a little similar to your skin tone. You’ll use them time and time again to blend out deeper colors or add dimension to your eyes.
Go for this if you want a neutral palette with an even number of mattes to shimmers so you can play to your heart's content (or just look like Shay Mitchell).
This one-and-done eyeshadow stick is the key to eye makeup for beginners.
A warm-toned, peachy eye will never go out of style and looks good on every skin tone and eye color.
This will help you achieve that ‘90s cool-toned, grungey eye.

Source: @iliabeauty
How to Start With Eyeshadow as a Beginner
Before you start applying shadow, you should know a little more about the different types.
- A matte shadow has no shimmer or shine; it’s just pigment. These are usually more pigmented and are good for blending in the crease. Mattes can also be a little harder to blend.
- A shimmer shadow obviously has shimmer running through it. While some formulations can be very opaque, others are a sheerer wash of the product versus a matte shadow. These are good for your eyelid and inner corner.
My favorite way to apply a shimmer eyeshadow, especially one with a lot of texture and glitter running throughout, is with my fingertip. It’ll pick up the most product and evenly disperse it, and the oils from your fingertip will make it look extra shiny and metallic.
“Any beginner to doing eye makeup should start with sheer, shimmer textures because they are easy to blend, look good without adding shades, and are very forgiving if something goes unblended,” Dorman said. She recommended starting with a cream formula to make the application easiest.
Any beginner to doing eye makeup should start with sheer, shimmer textures because they are easy to blend, look good without adding shades, and are very forgiving.

Source: Patrick Ta Beauty
How to Enhance Your Eye Shape With Shadow
Eye makeup involves a lot of shaping, whether it’s making your eyes look more almond-shaped with the fox eye trend or Twiggy-esque ‘60s smudgey mascara, making them look bigger. The shape you should go for often depends on the look you’re trying to achieve, but if you’re focused on the basics, Dorman said you should get to know your eye shape first to figure out what will work best for you. “Some eyes need a socket created, some eyes look great being a bit down-turned, other eyes need a lift—whatever your eye looks best in, keep that shape in mind when selecting and applying looks for your own face.”
Here are some easy tricks to highlight your natural eye shape:
- Almond Eyes: Blending your outer corner into a V-shape will lift and widen the eyes
- Hooded Eyes: Using light, shimmery shades on your lids and slightly into your natural crease will open up the eyes and emphasize your lids
- Deep-Set Eyes: Adding a light, shimmery shade to the inner corner will emphasize and bring your eyes forward
- Monolids: Applying the deepest shades at the base of the lid and gradually blending will enhance your natural shape
- Down-Turned Eyes: Applying your shadow in a cat-eye shape will lift and open the eyes
- Up-Turned Eyes: Adding lightness to the inner part of the eye and darkness to the outer half will emphasize the natural lift in your eyes
- Round Eyes: Putting shadow all over the lid and through the crease will keep your eyes open and bring attention to all of your lid space

Source: @katiejanehughes
How to Start With Bright/Editorial Makeup
If you’ve mastered the art of the neutral eye and are ready to take the plunge into the world of editorial beauty (welcome!), Dorman recommended first understanding textures. “If you use a product that is creamy and doesn’t dry down, your eye makeup will look great for a photo when you first apply it, but it won’t wear well for a day,” Dorman said. So if you’re new to the editorial, glossy style, opt for something simple to start, especially if you’re planning to wear it all night. “Try putting a glossy glitter over a powder shadow and see how it wears. A look like this is easy to touch up and doesn’t involve precise lines.” You’ll get a feel for how different eyeshadow textures work with your skin type and help you make better choices for looks in the future.
If you look at bright, fun eye makeup looks on Pinterest and wonder how they achieved that, they started small. “When using bright colors or going for more of an editorial look, start out light and work your way up to the intensity you’re going for,” Loiz said. Use a light hand to build up the color rather than stamping down a ton of pigment that would be hard to blend out.
This palette has so many shades to play with and in all different textures.
If you know you just want one trending hue (like green), opting for a single will save you money and space.
For the easiest eyeshadow look you’ll ever create that will garner all the compliments, use the matte shade in the crease and blend it out with a brush, then follow it with the metallic on the lid and inner corner.
Use a light hand to build up the color rather than stamping down a ton of pigment that would be hard to blend out.

Source: @sabletoothtigre
The Key to the Perfect Winged Liner
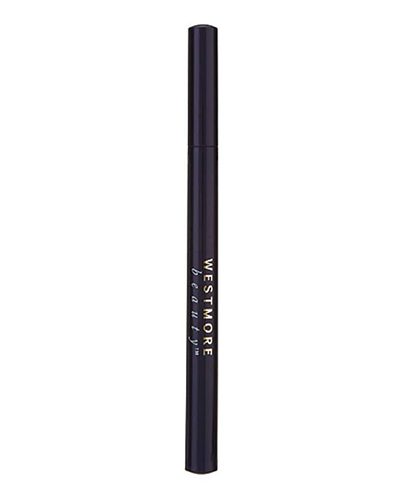
The first step to a good eyeliner look is finding a product that is easy for you to use. “I like liner pens that have a good consistent flow of product, like Westmore Beauty Wing Effects Liquid Eyeliner,” Dorman said. “Use the length of the pen itself by holding it from the end of your eye to the end of your eyebrow. That will be a good angle to use for your wing. Start small and build up slowly to a bigger wing. Keep your eyes open straight ahead when you look into the mirror to create the wing so it will look like the shape you want while your eyes are open.”
A felt-tip liner like this is key to getting a straight line every time.
A gel pot and a brush can be easier for creating a wing because the brush gives you a lot of control.
There’s a reason this has a cult following: It’s ultra black and has a super fine brush tip for creating precise lines.

Source: Glossier
How to Keep Mascara From Smudging
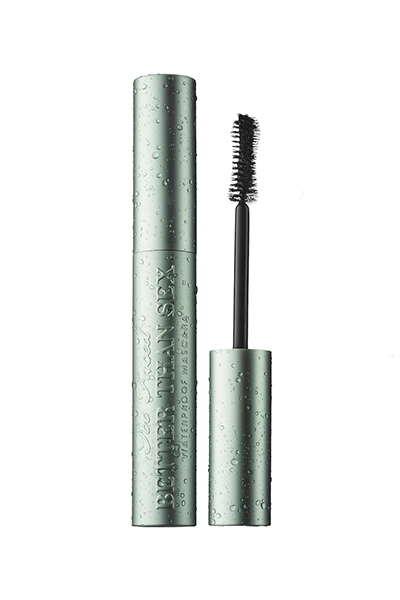
We all know the dreaded fear of looking at yourself in the mirror a few hours after putting your makeup on and seeing your mascara all smudged. Loiz suggested opting for waterproof mascara when you can because it won’t get disrupted by the oils and sweat on your skin. Dorman also recommended using a translucent powder underneath the eyes to reduce any of that oil as well. For all-day wear, blot the area throughout the day.
This is the critically acclaimed mascara we all know and love for it’s volume and length, but it's in a waterproof, smudge-free formula—even better.
You can go swimming with this on, and it still won't ever budge.
Applying this to your undereyes with a small powder brush will eliminate smudging if you need to use a non-waterproof mascara.


 "
"


