As both a beauty writer and a beauty lover, I spend a solid 30 percent of my day thinking about beauty. From the moment I wake up in the morning to sit in front of my vanity to writing this article at my desk to my skincare routine at night, the beauty industry takes up a lot of my mental real estate.
So, I decided 30 percent wasn’t nearly enough, and I followed all of my favorite makeup artists on Instagram! Now, I’m swimming in product recommendations, techniques, and hacks to glowing, smooth skin and flawless makeup application every time. The Instagram beauty sphere truly has it all.
I know not everyone can have such an extensive following list or spend two or more hours a day viewing Instagram stories (it’s my nirvana leave me alone), and I’m not about to let you all miss out on some of the best tricks I’ve found. Here, I’m sharing everything I’ve learned that makes getting ready in the morning just a little easier and makes makeup application a smooth sailing ship.
Skin prep is a must
If there’s anything I’ve learned from makeup artists, it’s the importance of prepping your skin before you even think about putting makeup on. Having a clean, smooth, and moisturized face is everything when it comes to the foundation step. Your foundation will look smoother, it’ll blend seamlessly, and it might have a longer wear time too! This step is crucial for day-to-day application.
However, Sir John (Beyonce’s makeup artist and one of my idols) skips moisturizer for summer concerts with Beyonce (i.e. BEYCHELLA!). In any case where you might sweat a lot, skip moisturizer to keep the foundation intact.
These AHA peel pads physically and chemically exfoliate away dead skin, leaving you with the softest, smoothest complexion before putting on any products.
If you have dry skin, a rich moisturizer will help your makeup last by keeping it hydrated all day. This one is ideal for all skin types and leaves a healthy radiant finish.
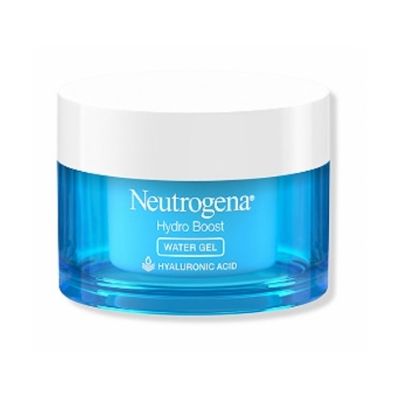
For oily skin, you still want a light moisturizer to keep a barrier between your skin and foundation, but opt for something in a gel consistency that leaves a natural finish like this drugstore favorite.
Press products into the skin — and don’t be gentle!
If you’ve ever watched someone apply an essence to their skin the K-Beauty way, you might think they’re seriously disturbed. However, many people (including Chriselle Lim!) swear by pressing your products into the skin. Chriselle goes as far as slapping the product into her face. And she isn’t gentle.
After some skepticism, I tried it, and this technique is no joke. Your face will be a little red right after, but it really helps get the blood flowing. I notice my face looks slightly less puffy in the morning, and I feel like I use less product overall!
Spray your brush with setting spray before foundation
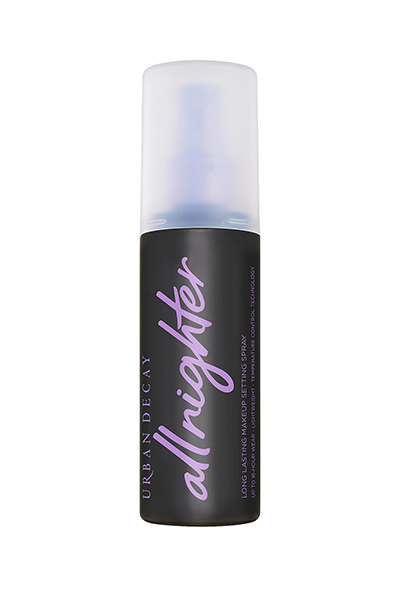
Add some extra glow to your skin (and keep your makeup in place all day) by spraying your brush with your setting spray before you apply foundation. While this trick sounds simple, it’s so easy and effective.
There's a reason this is still the most talked about setting spray—it works like no other to keep your products in place all day without drying out your skin or adding extra shine.
This setting spray is ideal for those with dry skin who need a bit of extra moisture to keep your products looking good longer.
Work in multiple layers
Instead of applying one, thick, full-coverage layer of foundation and being done with your base, many makeup artists—including international makeup artist Claudia Neacsu—work in thin layers to assure the skin looks natural and radiant while still covering blemishes or dark spots. She goes in with a little bit of product and builds it up rather than starting with something heavy from the get-go.
The way I’ve adopted this trick is by spot concealing before I even put my foundation on. I use a small brush and a little bit of concealer to go over anything I want to cover. Then, I only have to use a thin layer of foundation to even everything out. It actually ends up taking less time because that small amount of product blends seamlessly with the skin instead of a thick layer that doesn’t want to budge.
Pinpoint your setting powder
Gone are the days when we doused our entire faces in a heavy layer of powder for that matte skin look. While glowy skin has been on the up-and-up the last few years, it doesn’t take away the fact that many of us (even those with dry skin) can get oily sometimes, or that our makeup can crease. If you want to keep a glowy look that stays all day, the trick is using a small brush to pinpoint exactly where the powder is going to go. Celebrity makeup artist Katie Jane Hughes uses this trick all the time to keep the cheeks glossy and the undereyes from creasing.
When I set my face, I use a fluffy concealer brush to set just under the eyes where my concealer creases, the corners of my mouth, the sides of my nose, and my hairline. (What can I say, I sweat a lot!)
Arguably one of the most hyped powders out there, this one sets down makeup, reduces shine, and leaves your skin looking healthy and radiant—all in one.
For a velvet finish, this translucent powder is also great to keep i your bag for touch-ups. And because it's Fenty, it's actually completely translucent, meaning it can work on every single skin tone without looking ashy.
A small, fluffy brush like this will place a light dusting of powder just in the spots you get shiny.
For a velvety, blurred finish, use the tip of this puff to press powder into the skin. It's the closest you'll ever get to looking poreless.
Using metallic/shimmer shadows in the crease
Forget what you know, ladies and gents—it IS OK to use non-matte eyeshadows in the crease. (I know, gasp!) When most of us learned how to apply eyeshadow, we stuck to a very simple formula: matte crease, darkest color in the outer corner, shimmery eyelid. This formula has made many a beautiful eye looks, but if you’re looking for a more editorial or fun look, using one shadow through the lid and crease can provide that glossy lid look celebrities and makeup artists love.
This is also a fun way to change up your regular palettes and create new looks you might have never tried before.
Master one-eyeshadow looks with my favorite inexpensive shimmery shadow that always makes your eyes glimmer without tons of fallout onto your face.
And if you're new to eyeshadow, you can't go wrong with this neutral palette.
Adding hair strokes instead of “filling in” brows
The “Instagram” brow—a sharp arch that’s carved out to perfection—is on its way out, and the bushy, natural, undone brow look is taking its place. Makeup artists love this look because it emphasizes the eye look (especially long eyelashes) without distracting or taking away from it. To get it easily without getting brow extensions (yeah, it’s a thing!), add hair strokes with a thin eyebrow pen or a pomade and a thin liner brush. Instead of “filling” the brows in, simply make short little lines in the places you’d want extra hairs.
Then, to get the full look, use a clear brow gel to brush up the hairs.
This will help you achieve hair-like strokes in a matter of minutes thanks to a super-fine brush tip.
Dipbrow is for so much more than the blocky Instagram brow. Used with a fine brush, you can create ultra-hairlike strokes that actually make you look like you grew thicker brows overnight.
You'll need a really thin brush like this one to create very fine strokes.
For a laminated, bushy brow effect, this gel beats them all. It's completely clear and keeps your brows in place all day long.
Lip contouring (yes!)
I originally heard of this technique from Huda Kattan (of Huda Beauty), but it’s a common makeup artist trick to make your lips look bigger and to highlight the natural shape of your mouth. It looks amazing with just a little gloss—it’s subtle, but you can tell there’s a little somethin’-somethin’ going on.
Using either a cream contour or a brown lip pencil, carve out the shape of your lips. Huda has an amazing tutorial on her Instagram Stories that can explain it so much better than I can!
"Iconic Nude," "Pillow Talk," and "Foxy Brown" are three favorite shades!


 "
"


