

 "
"If a modern traditional style catches your eye and you appreciate a good “before and after” comparison, you are probably familiar with Erin Zubot—a designer who has mastered the art of DIY. Erin and her husband have owned nine houses and rental properties, all of which they have renovated in some way. Most recently, they did a kitchen renovation, and we have to admit: It’s our favorite project to date.

for when your hormones throw a party you didn’t RSVP to
Over three and a half months, a ’90s style kitchen was completely transformed with the help of Ikea cabinets, custom fronts, and a whole lot of DIYing, so of course, we asked Erin every little detail about the project.
There is so much to learn from her, so read on for Erin’s design process, her tips for optimizing space, what she recommends saving versus splurging on, and so much more.
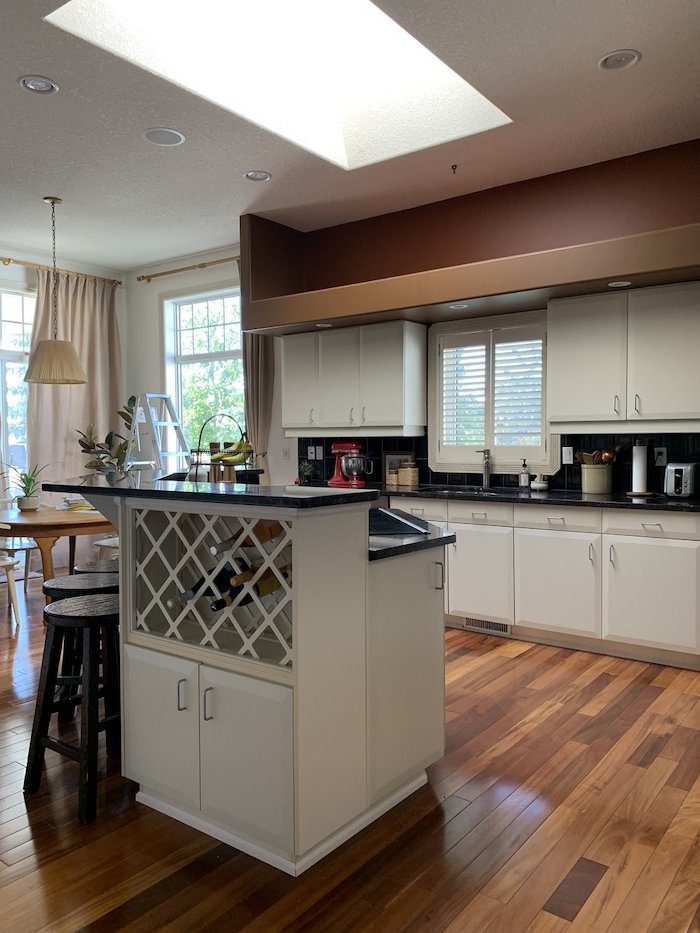
Before

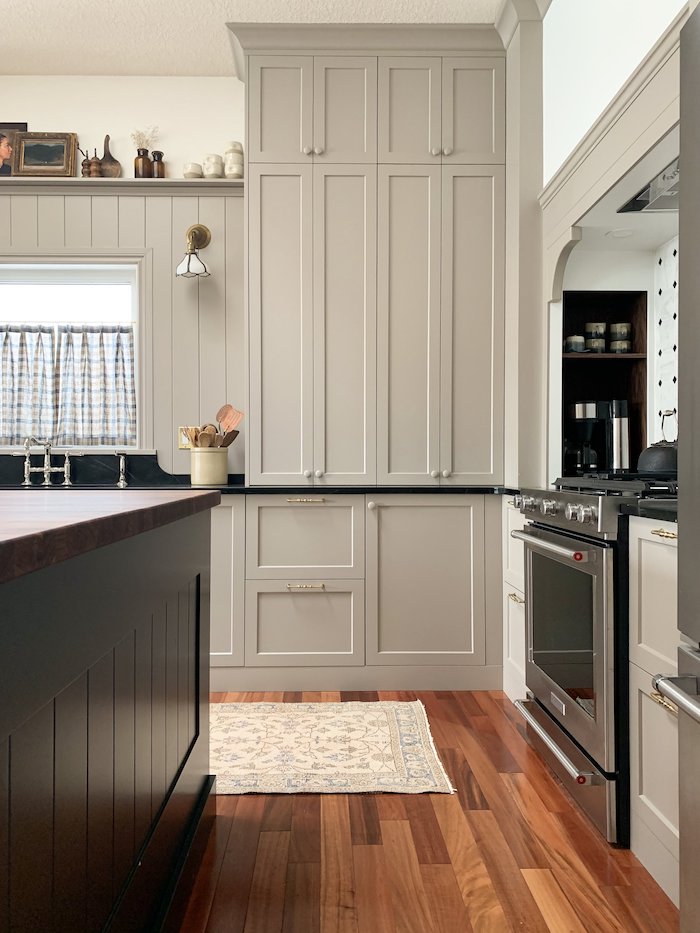
After

Before

After

Before

After

First, we can’t get over the before and after of this renovation. How long did the project take from start to finish?
Thank you so much! We demolished the old kitchen at the beginning of October (2021) and finished it up mid-January (2022), so about three months, give or take. We worked on it every weekend and most nights after work—it was long haul!
Did you run into any surprises or challenges during the renovation? Can you tell us about them and what you learned in the process?
There weren’t really any real “surprises” with the reno, as we didn’t find anything that we didn’t expect (unless you count a dead mouse during demo!). But there were quite a few design decisions that I made that I knew would be a struggle for us to DIY and I wasn’t sure exactly how we would tackle them; we just figured each one out as we went along.
We learned so much, like how to cut down a cabinet and build a door for it, how to add a veneer to wood, how to cut a template with a router—the list goes on. As we came across each challenge, I spent a lot of time doing research, and we went from there. Sometimes, we messed up, and we just tried again until we got it right.


Can we just say how much we love the cabinet paint color and that it’s a departure from white while still feeling equally as classic? What made you decide on this color?
As I scroll Instagram or Pinterest, I am always saving my favorite spaces. When it comes time to do a design, my very first step is to check what I’ve been pinning. Which spaces draw me to them the most and why? I found that my most loved kitchens were a little moody and a little English, and a lot of them had mushroom or taupe cabinets. It was a surprisingly easy decision to make when I looked at what I had been loving. Narrowing down the exact shade of taupe, well, that was a lot harder!
What are some of the best details in your kitchen from a functionality standpoint now that you are using your kitchen daily?
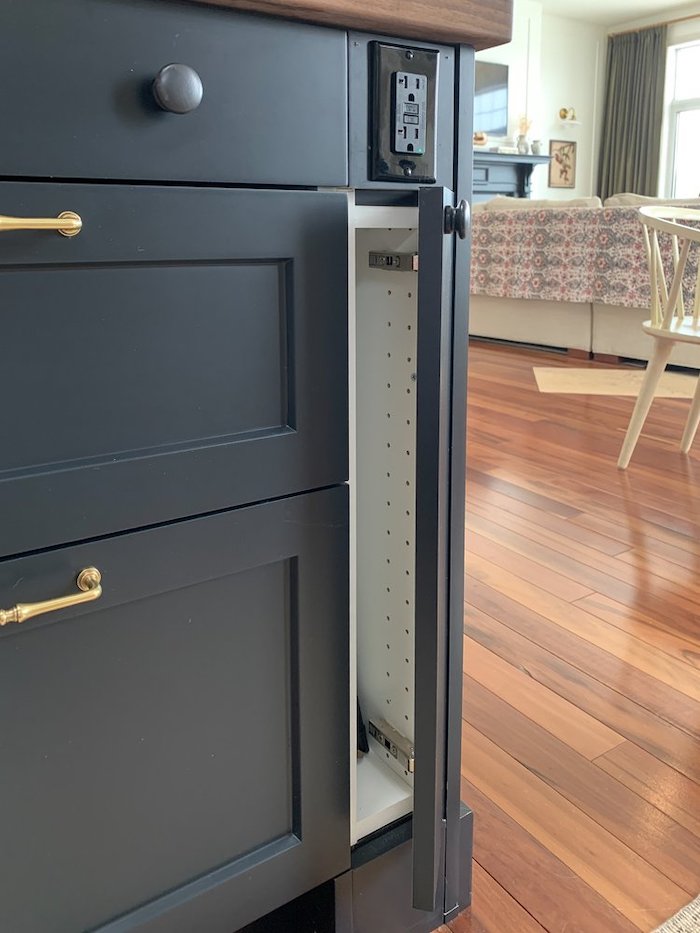
My #1 favorite thing is the pullout we made for the coffee maker! It’s so nice to have it easily accessible, and it’s just as easy to hide it away. I also love having the spice rack next to the oven; I find that so handy. We added a very skinny cabinet in the island to hold a stool, and that stool is pulled out often and it’s in such a convenient place to allow us to reach some of the tall uppers. Lastly, the big island. Having that huge surface is so functional for prepping and as an eating counter, and it also has full-depth cabinets on both sides, so the sheer amount of storage compared to the old island does not compare!
Can you talk to us about your inspiration for your backsplash and the process of creating it yourself?
I had fallen in love with a particular tile I saw in many English kitchens that was an octagon and dot shape, a classic pattern that I thought would be easy to find. I wanted to use marble or a similar stone for a higher-end look, and I was willing to spend a little more on this as it was a small area. I just could not find a tile that fit the bill; most of the tile I found were only 2 inches in size, and I wanted the tile to be closer to 5 or 6 inches so it wouldn’t look too busy. I finally reached out to a tile company to help me search and they also came up empty handed, but they offered to custom cut the tile for me. It was very expensive to do and we already owned a tile saw, so I thought before I went that route, I would buy a single marble tile from Lowe’s and see if I could do it myself.
The prototype worked out, so I went for it! Not only did I save money, but I also feel an immense amount of pride whenever I look at that backsplash now (and I used the money I saved on that backsplash to buy a very nice custom pull-out for my corner cabinet)!
Let’s talk about cost. You shared all the details on your Instagram, but we want to know: Is it true that every project goes over budget?
We recently added up all our receipts (finally!) and we were actually under budget, as we had planned a contingency that we didn’t really end up using. It is not true that every project goes over budget. I think the key to staying on track is to have a really, really detailed budget going into the project. When planning, I had a realistic (maybe even slightly inflated) budget for every last thing from the faucet to the crown moulding to the backsplash tile to the sheets of MDF we used for the range hood.
As I made design decisions, if I decided to splurge in one area over the allowance I had given myself (for example, my faucet), I looked for ways to make that amount up elsewhere by choosing something less expensive or doing something ourselves instead of hiring it out. Of course, there are often unexpected issues, so having a good amount set aside for emergencies is important. We generally budget an extra 10% for unknowns and if we don’t use it, great!
What was most important to you when you started designing the space?
Believe it or not, my priority was having a place to hide away my small appliances, particularly my coffee maker. I did not want it hanging out on my cupboard and was not able to have a closed appliance garage according to local code, so my first priority was finding a place to stash it. Of course, I wanted to have enough storage in general and a good functional layout too—the old layout was making me crazy!
Before

After


There are so many interesting details in your hardware, from the light switches to the drawer handles and the faucets. They are all so different but blend together seamlessly. How do you find this balance and what advice would you give to readers wanting to do the same?
I think mixing materials always leads to a much more interesting design, so my advice would be to just go for it. Things like hardware are a little easier to change up if you decide in five years that you no longer like it or if the finish goes out of style, so have a little fun! When mixing metal finishes, I like to have a primary and secondary metal, one warm and one cool in tone to keep things feeling balanced. In my case, my primary metal was brass (warm) and the secondary metal was polished nickel (cool). As far as the style goes, everything I chose was all pretty traditional, so that helped keep all the different hardware cohesive.
You mentioned that you were aiming for a high-end look without the custom price tag. Looking back, is there anything that you splurged on in the process that you wish you saved on, or is there anything that you decided to save on that you wish you would have splurged on?
The only thing I splurged on that I kind of wish I hadn’t is the faucet. It was quite a bit more expensive than other options that I was considering. It started making a noise recently and I had to contact the company for a warranty issue. Unfortunately, I feel like it is no better (functionally) than some of the less expensive brands I was considering.
We also decided to do flush (instead of recessed) toe kicks on the perimeter cabinets, and while it wasn’t a splurge, exactly, it was very tricky to do and I’m not sure I would do it again. I love how it turned out, but I’m not sure it was worth the extra effort to get that look.
If you had asked me mid-reno, I would have said I regretted saving on labor, as this project was very labor intensive for me and my husband. As we were nearing the end, we talked a few times about hiring a carpenter to finish it. However, I don’t regret that now, as we are very proud of how it turned out and have that sense of accomplishment attached to our new kitchen.


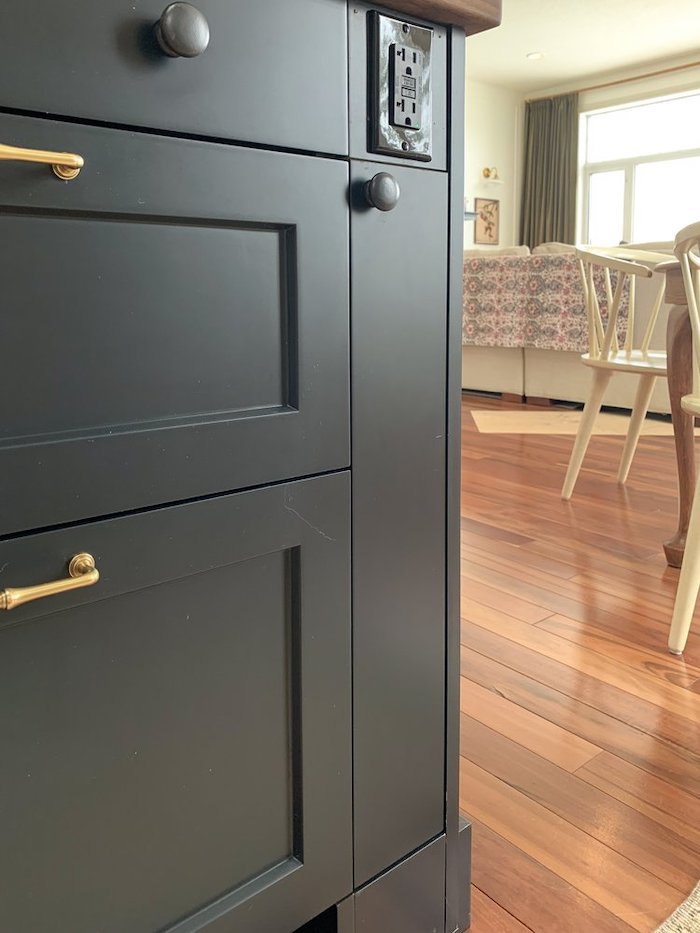
We added a very skinny cabinet in the island to hold a stool, and that stool is pulled out often and it’s in such a convenient place to allow us to reach some of the tall uppers.
Keeping budget in mind, what small price upgrades did you make in your kitchen that you think made a big style upgrade?
The built-in dishwasher with a custom front. It doesn’t cost that much more for a built-in dishwasher than a regular dishwasher, so for the cost of a cabinet door, your dishwasher can blend in seamlessly with the lower cabinets.
Before
After

You and your husband have made improvements to nine houses and rental properties. What is one piece of advice you would give readers when it comes to keeping renovations affordable?
I would say consider resale, even if you don’t plan on moving. Life happens and things change, and you want to make sure you are making a good investment. It doesn’t always make sense to put the best materials into every project, but that doesn’t mean you can’t make huge improvements with small changes. Things like paint and furniture and styling go a long, long way—and light fixtures! Nothing says builder basic like a boob light! There are plenty of affordable lighting options out there these days, and if you keep your eyes open, you may even find a vintage gem.

Finally, what project can we expect to watch you take on next?
I just finished redoing a guest room in my basement, and I am gearing up for the next One Room Challenge that starts in April. I don’t want to say just yet what it is, but you can expect more vintage finds and affordable upgrades. I’m excited for it!
